







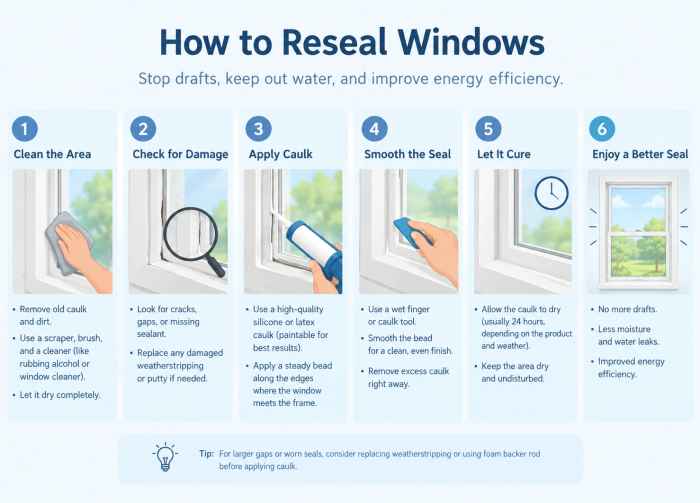

To get rid of drafts, stop water leaks, and lower your energy bills, you can learn how to reseal windows by scraping away old, cracked sealant and applying a fresh bead of exterior-grade silicone caulk. This straightforward home improvement project takes less than an hour per window but immediately protects your house from moisture damage and temperature loss.
Here is the thing most online tutorials miss: people often buy the cheapest tube of caulk available and squirt it directly over the old, failing seal. That never works. If you do not pull off the old, brittle layers first, your new caulk will peel away within a single season.
Let’s walk through how to do this job properly so it lasts for a decade.
Why You Need to Know How to Reseal Windows
Old houses shift, summers scorch, and winters freeze. This continuous movement causes the sealant around your window frames to shrink, crack, and eventually split apart.
When that bond breaks, outdoor air flows freely into your living space. You might notice your curtains moving slightly on a windy day, or you might feel a distinct cold spot when walking past your living room window.
Resealing is not just about comfort. It is about maintaining a barrier against external elements. When you master how to reseal windows, you take control of your home’s envelope. It prevents small drafts from turning into expensive structural repairs.
The Real Costs of Ignoring Failing Window Seals
Leaving gaps open to the elements carries real financial consequences. Let’s look at a concrete scenario.
A typical 100-year-old home in New England with fifteen drafty windows can easily leak enough conditioned air to add $200 to $400 to your annual utility bills. Warm air escapes from the top of the house while cold air gets sucked into the basement.
+-----------------------------------+-----------------------------------+

| Window Condition                  | Average Annual Energy Impact      |
+-----------------------------------+-----------------------------------+

| Severely Cracked / Missing Caulk  | 10% to 15% increase in HVAC costs |
+-----------------------------------+-----------------------------------+

| Freshly Sealed (Silicone/Poly)    | Baseline optimized efficiency     |
+-----------------------------------+-----------------------------------+
Water damage is even worse than energy loss. A small crack in the top exterior casing of a bedroom window can let driving rainwater seep behind your drywall. Over two or three years, that hidden moisture rots the wooden framing studs and feeds toxic black mold. By the time you notice bubbles in your interior paint, you are looking at a $3,000 contractor repair bill instead of a $10 DIY fix.
Tools and Materials: What to Buy Before You Start
Do not run to the hardware store without a specific list. Spending an extra five dollars on quality materials saves you hours of frustration later.
-
- 100% Silicone or Polyurethane Sealant: Buy a high-quality exterior product like GE Advanced Silicone or Loctite Quad. Avoid cheap latex painter’s caulk for exterior window perimeters; it shrinks too much and breaks down under UV sunlight.
- Caulk Gun: A high-torque, drip-free caulk gun with a smooth push-rod mechanism makes a massive difference.
- 5-in-1 Painter’s Tool or Utility Knife: You need a rigid blade to pry up stubborn, sun-baked sealant layers.
- Rubbing Alcohol (Isopropyl): This cuts through oily residues and ensures the new material adheres perfectly.
- Blue Painter’s Tape: Crucial for achieving crisp, straight edges if you do not have a perfectly steady hand.
How to Reseal Windows in 5 Steps
Before starting, check the weather forecast. You need a dry day where the temperature stays between 40°F and 90°F so the compound cures correctly.
Step 1: Strip Away the Old, Failed Caulk
Take your utility knife or a 5-in-1 tool and slice down both sides of the old sealant bead. Push the blade firmly behind the material to break its bond with the brick mold or vinyl siding. Grab one end of the loosened strip and pull it away. It should come out in long, rubbery or brittle pieces. If small chunks remain stuck in the corners, scrape them clean until you see the bare wood, vinyl, or aluminum frame underneath.
Step 2: Clean and Prep the Window Track
Vacuum up all loose crumbs, dust, and dried flakes from the gap. Pour a generous amount of rubbing alcohol onto a clean microfiber rag and scrub the entire joint down thoroughly. This removes hidden grease, dirt, and mold spores. Let the surface dry completely for ten minutes. If the substrate is wet, your new sealant will trap moisture underneath and fail to stick.
Step 3: Tape Your Lines for a Clean Finish
If you want professional results, use painter’s tape. Apply one strip along the window frame and a second strip along the outer wall siding, leaving a quarter-inch gap between them. This gap is where your new material will go.
Step 4: Apply the New Sealant Bead
Cut the plastic tip of your caulk tube at a 45-degree angle. Keep the opening small—about the size of a BB pellet. If you cut it too wide, you will flood the joint with excess product. Puncture the inner foil seal with a long nail, load the tube into the gun, and hold the tip at a 45-degree angle to the window joint. Squeeze the trigger with steady pressure while pulling the gun along the gap in one fluid, continuous motion. celebritytimes
Step 5: Smooth the Joint and Remove the Tape
Lightly wet your gloved finger with a mix of water and liquid dish soap, or use a plastic profiling tool. Drag it along the freshly applied bead to press the material deep into the gap and create a smooth, concave finish. Immediately pull off the painter’s tape while the caulk is still wet. Pull the tape away at a 45-degree angle to ensure clean, razor-sharp lines. Let it cure undisturbed for 24 hours.
Common Window Caulking Mistakes to Avoid
Most homeowners make the classic mistake of using a wet bare finger to smooth out pure silicone caulk. Silicone is incredibly sticky and does not wash off with water. It stains your skin and leaves a messy, smeared smear across the glass. Always wear nitrile gloves or use a dedicated smoothing profile tool.
Another trap is caulking the weep holes. Take a close look at the bottom exterior frame of your vinyl windows. You will see small, rectangular slots designed to let internal condensation escape to the outside. If you accidentally run a thick bead of caulk over those holes, water backs up inside the window track, overflows into your wall cavity, and ruins your subfloors. Leave those drainage paths clear.
Frequently Asked Questions About Resealing Windows
How often should you reseal home windows?
High-quality silicone or polyurethane sealants last between 10 and 20 years. However, you should inspect your windows every autumn for micro-cracks, peeling edges, or hardening, especially on south-facing walls that get intense sunlight exposure.
Can you apply new caulk directly over old caulk?
No. New sealant will not adhere properly to old, dirty, or weathered caulk. The old layer will continue to lift away from the frame, pulling your new product with it and rendering your work useless within a few months.
What is the best temperature to reseal windows?
The ideal outdoor temperature range is between 40°F and 90°F. If it is too cold, the product stiffens and will not smooth out cleanly; if it is too hot, the caulk skins over and cures too quickly, preventing a strong bond.
Should I seal windows from the inside or the outside?
You should focus your main weatherproofing efforts on the outside of the window to stop rainwater and wind from entering. However, adding a neat bead of interior paintable acrylic latex caulk along the indoor trim helps eliminate localized drafts and clean up the room’s appearance.
Conclusion
The single most important takeaway when learning how to reseal windows is that preparation dictates your success. Taking the time to scrape away every leftover scrap of old sealant and thoroughly cleaning the bare frame with rubbing alcohol guarantees a waterproof bond that protects your home for years.
